The aim of this article is to provide a good starting place for using Ansible with SR OS. It provides some examples of creating structured Ansible playbooks and demonstrates Nokia SR OS specific Ansible modules as well as some of the generic network interfacing modules.
If you have never used Ansible or never used Ansible with SR OS then this should be your first port of call.
This article is written in the form of a tutorial. It assumes that you have access to one or more Nokia SR OS 7750/7950 routers (or vSIMs) and that you have a valid license for these products (if you need any of these, please contact your Nokia representative). It also assumes that you have access to a Linux machine from which to work (although it is possible to manage your SR OS devices from other host operating systems).
The following elements were used in this article:
| Item | Version |
|---|---|
| SR OS | 23.3.R2 |
| CentOS | 7.8 |
| Ansible | 2.11 |
Let's get to it. There are a few steps we are going to run through in this intro to Ansible and SR OS.
This article assumes your SR OS devices are already configured to operate in model-driven mode and have NETCONF enabled. If your network devices are not currently set to model-driven mode and do not currently have NETCONF enabled, this can be achieved by entering the following SR OS configuration statements.
Note: The example below uses a newly created netconf user rather than the built-in admin user. You should set the permissions for this user appropriately for your network. In this example the netconf user is a member of the administrative group so they can access all configurations and actions but you should be selective about access and permissions in a live network.
/configure system security profile "netconf" netconf base-op-authorization lock
/configure system security profile "netconf" netconf base-op-authorization kill-session
/configure system security profile "netconf" netconf base-op-authorization action
/configure system security profile "netconf" netconf base-op-authorization cancel-commit
/configure system security profile "netconf" netconf base-op-authorization close-session
/configure system security profile "netconf" netconf base-op-authorization commit
/configure system security profile "netconf" netconf base-op-authorization copy-config
/configure system security profile "netconf" netconf base-op-authorization delete-config
/configure system security profile "netconf" netconf base-op-authorization discard-changes
/configure system security profile "netconf" netconf base-op-authorization edit-config
/configure system security profile "netconf" netconf base-op-authorization get
/configure system security profile "netconf" netconf base-op-authorization get-config
/configure system security profile "netconf" netconf base-op-authorization get-data
/configure system security profile "netconf" netconf base-op-authorization get-schema
/configure system security profile "netconf" netconf base-op-authorization validate
/configure system security user "netconf" access netconf
/configure system security user "netconf" password nokia123
/configure system security user "netconf" console member "netconf"
/configure system security user "netconf" console member "administrative"
/configure system management-interface yang-modules nokia-combined-modules
/configure system netconf auto-config-save
/configure system netconf no shutdown
/configure system management-interface cli md-cli auto-config-save
/configure system management-interface configuration-mode model-drivenFor this example we are going to create our playbooks using roles. More details on Ansible roles can be found here.
Let's create a directory structure as follows:
+--sros-ansible-101
  +--group_vars
  +--roles
     +--initial_router_setup
        +--tasks
From your sros-ansible-101 directory (or whatever you called your root directory) create the directories:
mkdir -p group_vars
mkdir -p roles/initial_router_setup/tasks
Additionally, we will use a file for defining example-wide variables (global variables). This file is the group_vars/all file so let's ensure that it exists.
touch group_vars/allOur network is going to look as follows:

It has two SR-1 SR OS routers (for the example I used vSIMs but the example will work identically on hardware routers as well):
The IP address of the Ansible client we will use (Server in the diagram) does not matter as long as you have IP reachability to the 192.168.5.0/24 subnet and the router's BOF knows how to get back to the Ansible device.
Now we need to create an inventory file for Ansible to know what devices it must configure. For this example we are going to place the inventory file in the root of your playbook (and we'll call it inventory to make it simple although you can call it anything you want).
Create the inventory file in your favourite editor. It's should contain the following:
[sros_routers]
vsim10        ansible_ssh_host=192.168.5.10
vsim11        ansible_ssh_host=192.168.5.11
The top section in the square brackets defines the group of devices. We will use this inside the playbook later. The other lines are the actual routers (one per line). The first field is the hostname. As there is no DNS configured in this lab example the ansible_host= portion creates a field for each device with the IP address of the device (BOF/Management IP) in Ansible.
The playbook needs to know how to log in to the SR OS devices that it will be interacting with. For the purposes of this example we will use a user called netconf with the password nokia123 as the authentication credentials. We will also disable a number of the SSH security features for the purposes of this learning experience, however, in an operational environment you would not do this.
Let's add the following to the group_vars/all file:
ansible_ssh_user: netconf
ansible_ssh_pass: nokia123
ansible_ssh_common_args: '-o UserKnownHostsFile=/dev/null -o StrictHostKeyChecking=no'
ansible_connection: ansible.netcommon.netconf
ansible_network_os: <network-os>
ansible_host_key_auto_add: yes
ansible_host_key_checking: False
Now let's create the framework playbook. In order to create a framework that is easily expansible in future this is going to be a little more involved than it really needs to be for a simple playbook, however, the small amount of extra effort should be beneficial once you have completed this lab and move onto bigger and better things.
We will use Ansible tags to partition our runtime element. This means that you will be able to run smaller sections of a larger playbook rather than always running all of the playbook. It also means that we will initially always call the same main playbook file (site.yml in this example).
- hosts: sros_routers
  gather_facts: false
  roles:
    - initial_router_setup
  tags: [ 'never', 'setup' ]
The file is formatted in YAML and the first line references the group that we created in the inventory file. What this file says is that for every device in the group sros_routers you should execute the playbooks and tasks available in the initial_router_setup role but only when Ansible is passed the tag setup. The gather_facts: false line stops Ansible from trying to connect via standard SSH (using Python's Paramiko library) in order to determine details about the device.
We will cover how to execute the playbook shortly.
We have now set up the base framework for our Ansible playbook. Running your playbook won't actually do anything yet so let's move on and start to configure our devices.
All workflows in Ansible are made up of a number of plays. Each play executes a module. Modules are part of the Ansible framework and there any many supplied (and you can develop your own, but this is well out of scope).
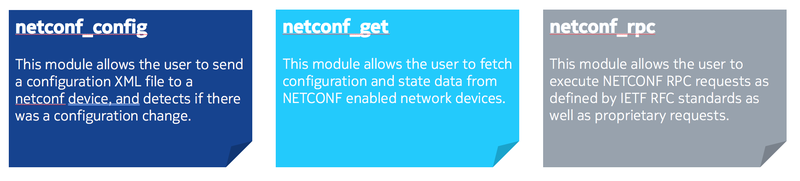
Nokia SR OS devices can be managed using SR OS specific Ansible modules or by using standard protocol based modules.
The following are Nokia SR OS specific Ansible modules that execute CLI commands and actions on SR OS devices.

As Nokia SR OS provides model-driven management, Nokia recommends that standard network interface modules supplied with Ansible be used for configuration of network devices. These standard modules are:
The plays described below are all using the standard network interface modules supplied by Ansible.
Let's create our first play. This first play will obtain the currently configured router hostname (system name) in the running configuration datastore and display it on the screen.
Create the file roles/initial_router_setup/tasks/get_configured_hostname.yml and add the following into it:
---
- name: Obtain the currently configured hostname over NETCONF
  connection: netconf
  netconf_get:
    source: running
    filter: <configure xmlns="urn:nokia.com:sros:ns:yang:sr:conf"><system><name/></system></configure>
  register: running_config

- name: Extract the name variable from the XML response
  xml:
    xpath: /nc:data/nokia:configure/nokia:system/nokia:name
    xmlstring: "{{ running_config.stdout }}"
    content: text
    namespaces:
      nc: "urn:ietf:params:xml:ns:netconf:base:1.0"
      nokia: "urn:nokia.com:sros:ns:yang:sr:conf"
  delegate_to: localhost
  register: configured_router_name

- name: Output the hostname currently configured in the running configuration datastore
  debug:
    msg: "The currently configured hostname in the running configuration datastore is {{ configured_router_name.matches[0]['{urn:nokia.com:sros:ns:yang:sr:conf}name'] }}"
This playbook contains three plays (or tasks):
These plays will run in order from top to bottom.
Each play has a name that will be displayed on the console as you execute the playbook. Each play calls a module (for a list of Ansible modules click here) that performs specific tasks.
By default, if a play fails in Ansible, then the playbook will also fail. This behavior can be adjusted so that errors are ignored by using the ignore_errors keyword (see the Ansible documentation for details).
The first play sets the Ansible connection type (plugin) to netconf as this is the communications protocol that we wish to use to communicate with the devices. The default connection type (plugin) is ssh which is implemented in Ansible using the Python paramiko library. Without setting the connection to netconf you will be unable to communicate with the router and our playbook will fail.
Next it calls the netconf_get Ansible module. This sets up the NETCONF connection to the router (via the connection plugin defined above) over SSH on port 830. It supplies the username and password we provided in the group_vars/all file earlier. It also ensures that any SSH messages about keys are quashed (as defined in the group_vars/all file). It then sends the NETCONF GET RPC to the routers with the fields provided as follows:
The filter provided to the router is <configure xmlns="urn:nokia.com:sros:ns:yang:sr:conf"><system><name/></system></configure>. This filter is the path from the Nokia YANG models for configuration to the system name (hostname). You will notice that the XML namespace for the Nokia configuration YANG models is provided inside the filter so Ansible knows what to query the device for.
Finally this play creates (registers) a new variable (for each router it executes on) containing the output from the router. This variable is actually a list of sub-variables that can be used later. The variable this play creates is called running_config.
This play uses the Ansible XML module and takes the running_config variable created as a result of the previous play as its input.
The raw output of the running_config variable is as follows:
msg:
    changed: false
    failed: false
    output: null
    stdout: |-
      <data xmlns="urn:ietf:params:xml:ns:netconf:base:1.0" xmlns:nc="urn:ietf:params:xml:ns:netconf:base:1.0">
              <configure xmlns="urn:nokia.com:sros:ns:yang:sr:conf" xmlns:nokia-attr="urn:nokia.com:sros:ns:yang:sr:attributes">
                  <system>
                      <name>VSIM</name>
                  </system>
              </configure>
          </data>
    stdout_lines:
    - <data xmlns="urn:ietf:params:xml:ns:netconf:base:1.0" xmlns:nc="urn:ietf:params:xml:ns:netconf:base:1.0">
    - '        <configure xmlns="urn:nokia.com:sros:ns:yang:sr:conf" xmlns:nokia-attr="urn:nokia.com:sros:ns:yang:sr:attributes">'
    - '            <system>'
    - '                <name>VSIM</name>'
    - '            </system>'
    - '        </configure>'
    - '    </data>'
You will see that there are two fields with identical information, formatted in slightly different ways:
Both fields contain data formatted in XML as this is what the SR OS router returns from a NETCONF query.
As we only want to process this data once, we will use the stdout attribute in the running_config variable. This is referenced in the xmlstring attribute of the play as follows "{{ running_config.stdout }}"
The xpath line in the play queries the input (running_config.stdout) for the specific path to the element we are interested in within the XML data. Important is to also consider the namespaces for the appropriate xml matching. In this example this is /nc:data/nokia:configure/nokia:system/nokia:name
Considering the namespaces are:
The content line defines whether we wish to return the attribute (name in the example) or the text (which will supply both the key and the value, so name and vSIM in the example above).
The delegate_to attribute is important. By default, Ansible will try to execute every play on every host that is defined within the group of hosts (as described in the inventory file). In this example this means that it would try to log in to each router via SSH and then execute the XML module (which in turn uses the lxml python library) on the SR OS MD-CLI shell. This would not work, and even if it did, it would be inefficient. The delegate_to attribute tells Ansible to execute this play on a different host (localhost in this case, therefore locally on this machine).
The register line creates a new variable as in the first play, this time called configured_router_name.
This play uses the Ansible debug module and takes the output from the previous play (configured_router_name) and displays it on the screen as part of a message (msg).
This play is pretty self-explanatory; however, the item that should be described is embedded within the output string of the message: {{ configured_router_name.matches[0]}}.
Play 2 yields the configured_router_name variable and as previously, this variable contains a number of sub-attributes. The raw output of this configured_router_name variable is actually:
actions:
    namespaces:
      nc: urn:ietf:params:xml:ns:netconf:base:1.0
      nokia: urn:nokia.com:sros:ns:yang:sr:conf
    state: present
    xpath: /nc:data/nokia:configure/nokia:system/nokia:name
  count: 1
  invocation:
    module_args:
      add_children: null
      attribute: null
      backup: false
      content: text
      count: false
      input_type: yaml
      insertafter: false
      insertbefore: false
      namespaces:
        nc: urn:ietf:params:xml:ns:netconf:base:1.0
        nokia: urn:nokia.com:sros:ns:yang:sr:conf
      path: null
      pretty_print: false
      print_match: false
      set_children: null
      state: present
      strip_cdata_tags: false
      value: null
      xmlstring: |-
        <data xmlns="urn:ietf:params:xml:ns:netconf:base:1.0" xmlns:nc="urn:ietf:params:xml:ns:netconf:base:1.0">
                <configure xmlns="urn:nokia.com:sros:ns:yang:sr:conf" xmlns:nokia-attr="urn:nokia.com:sros:ns:yang:sr:attributes">
                    <system>
                        <name>VSIM</name>
                    </system>
                </configure>
            </data>
      xpath: /nc:data/nokia:configure/nokia:system/nokia:name
  matches:
  - '{urn:nokia.com:sros:ns:yang:sr:conf}name': VSR
  msg: 1
  xmlstring: |-
    <?xml version='1.0' encoding='UTF-8'?>
    <data xmlns="urn:ietf:params:xml:ns:netconf:base:1.0" xmlns:nc="urn:ietf:params:xml:ns:netconf:base:1.0">
            <configure xmlns="urn:nokia.com:sros:ns:yang:sr:conf" xmlns:nokia-attr="urn:nokia.com:sros:ns:yang:sr:attributes">
                <system>
                    <name>VSIM</name>
                </system>
            </configure>
        </data>
There is an attribute called matches that is a list (as denoted by the [ ]'s). This attribute contains all the matches from the xpath expression in the previous play. As there was only one match, there is only one entry in the list. Depending on our xpath expression there could have been more.
Our play wants to output the first match list item only and so you will see configured_router_name.matches[0] shown. Inside this match we want to output the value of the key, name. The full variable path embedded in the output string (sentence) needs to also consider the namespace, the full path would result in configured_router_name.matches[0]['{urn:nokia.com:sros:ns:yang:sr:conf}name']
As we are using Ansible roles to define our playbook there is one final step that must be taken prior to execution.
Ansible roles are defined inside a directory (we created the initial_router_setup role by creating this directory inside the roles directory). When roles are executed (or referenced depending on your phraseology), Ansible looks inside the role directory for a tasks directory. Inside this tasks directory it will execute the main.yml file. If there is no main.yml file, nothing will happen.
Currently, there is no main.yml file in our playbook so create it now as roles/initial_router_setup/tasks/main.yml containing:
- include_tasks: get_configured_hostname.ymlWe are now ready to run our playbook for the first time.
Running the playbook is straightforward; however, due to the tagging system we configured, running the playbook without passing a tag identifier will validate the Ansible playbook and terminate successfully but will not actually run our tasks inside the initial_router_setup role (or any other role).
You can see this here:
ansible-playbook -i inventory site.ymlPLAY [sros_routers] **************************************************************************************************************************************************************************************************
PLAY RECAP ***********************************************************************************************************************************************************************************************************Therefore, let's pass the setup tag that we defined in the site.yml file. This is done using the -t <tag_name> or --tags=<tag_name> option. Multiple tags can be sent if desired as well and these would be comma separated (no need in this example though).
ansible-playbook -i inventory site.yml --tags=setupPLAY [sros_routers] *********************************************************************************************************************************
TASK [initial_router_setup : include_tasks] *********************************************************************************************************
included: /root/git/SROS-Ansible-Examples/sros-ansible-101/roles/initial_router_setup/tasks/get_configured_hostname.yml for vsim10, vsim11
TASK [initial_router_setup : Obtain the currently configured hostname over NETCONF] *****************************************************************
ok: [vsim11]
ok: [vsim10]
TASK [initial_router_setup : Extract name variable from the XML response] ***************************************************************************
ok: [vsim10]
ok: [vsim11]
TASK [initial_router_setup : Output the hostname currently configured in the running configuration datastore] ***************************************
ok: [vsim10] => {
"msg": "The currently configured hostname in the running configuration datastore is vSIM"
}
ok: [vsim11] => {
"msg": "The currently configured hostname in the running configuration datastore is vSIM"
}
PLAY RECAP ******************************************************************************************************************************************
vsim10 : ok=4 changed=0 unreachable=0 failed=0 skipped=0 rescued=0 ignored=0
vsim11 : ok=4 changed=0 unreachable=0 failed=0 skipped=0 rescued=0 ignored=0The flag in front of the device name in the output indicates whether Ansible made a change. You may see one of the following options:
From the output, you can confirm that all plays (tasks) succeeded (ok) and no device configurations were changed. The sentence defined within the playbook (play 3) is outputted to the screen for each device in the inventory file group with the currently configured host (system) name placed into this sentence.
From this initial introduction we have already automated multiple SR OS network devices and achieved the following:
The Ansible sections on this developer portal have other information to help you on your automation journey.
There is more information on integrating other tools, including Nokia's Network Service Platform (NSP), into your automation framework available on the developer portal as well. If you want more information about Nokia's IP routing products, follow this link.
 /
/